

You can probably relate this story of mine to yours-
“I was starving after a long, exhausting day. So, I grabbed a leftover burrito and tossed it in the microwave. I was excited. Thought I was about to eat something amazing.”
But nope. I was a bit disappointed. What came out?
The tortilla that felt like rubber. The outside was tough, almost chewy, and the middle? Still kind of cold. Not what I remembered from when it was fresh.
That moment, kicked off something for me.
I needed to figure this out. How do you reheat a burrito without wrecking it? I wanted it to taste good. Like… even better than before, maybe.
So I went in. Tried everything-
- The microwave? Fast, sure.
- The stovetop? A little more effort, but sometimes worked.
- The oven? Kinda slow.
- Air fryer? Hopes were high.
- And some others as well.
But… the results? All over the place. Sometimes it worked. Sometimes it was bad. Still, I kept at it. Bit by bit, I figured some stuff out. Heat matters, obviously. But also moisture and timing.
I didn’t want it to just be “hot.” I wanted it to taste like it was just made. Like, you bite in and everything’s warm, and flavorful, and the tortilla isn’t falling apart like a sad paper towel.
So yeah. That’s where this little burrito mission started. I’m gonna break down the best way to reheat a burrito without destroying it. Just stuff I learned by messing up a lot.
Let’s make sure your burrito doesn’t suck.
The Tricky & Challenging Parts
Look, if you are a picky eater like me, you can understand, that it’s not as easy as just tossing a burrito in the microwave and hoping it comes out edible. It’s a bit more complicated than that. How?
There are a few burrito-reheating checkpoints to watch out for.
First up are the filling and the tortilla.
A burrito’s got a lot going on. There’s the juicy meat. The fluffy rice. The creamy beans. Melted cheese. All that needs to be hot and tasty. But the tortilla? That thing is fragile.
If it gets hit with the wrong kind of heat, you’re looking at two extremes:
- Either soggy mush or
- Crunchy dessert cracker.
Then, there’s the uneven heating issue
Ugh. I’ve lost count of how many times I’ve taken a bite and hit a freezing-cold middle. Meanwhile, the edges are one degree away from lava.
This usually happens ’cause microwaves aren’t great at heating things evenly. They’ve got some hot spots and cold zones. Even ovens can mess it up if the heat’s not dialed in just right. The outside dries out. Inside’s still chilly.
And yeah, safety’s a thing too.
You have to make sure it hits at least 165°F all the way through. Just warming it until it “feels hot” isn’t enough. If the heat doesn’t go deep enough, that’s a no-go.
The Best 6 Ways To Reheat A Burrito
Here I will show you all step by step process on how to reheat burritos using the most efficient ways. First take a look at this table and choose which way you want to start with.
| Method | Wrapping | Temperature | Reheat Time |
| Oven | Aluminum foil | 225 °F (107 °C) or 350°F (177°C) | 30 minutes or 15-20 minutes |
| Air Fryer | No wrapping or drizzle with oil | Preheat. 350°F (177°C) or high temperature for crisping. | 6-8 minutes or 30 seconds (for tortillas) |
| Stovetop | Unroll burrito, keep lid on pan | Medium-low to medium heat | 5 minutes per side |
| Microwave | Damp paper towel | Medium power | 45-90 seconds |
| Panini Press | Wrap burrito in aluminum foil | – | Varies |
| Deep Frying | No Wrapping | 365°F (185°C) | Varies |
Method #1: Reheating in the Oven
First, let’s see my go-to method for reheating a burrito: the oven.
Why? It just works. Every time. Gets the burrito warm all the way through and makes it taste almost like you just made it.
So let’s say I’ve got a leftover burrito from the night before.
Step #1
First thing I do? Preheat the oven.
Step #2
Now the temp can kinda depend on the situation-
- Keep it low, like 225°F, so you don’t toast the tortilla.
- Others go with 350°F for that nice balance between warming and crisping.
- For frozen ones, I prefer to heat it up to 375°F.
Personally? I stick with 350°F if it’s been in the fridge. It just seems to work. If it’s frozen (and I actually remembered to thaw it), I still roll with 350°F, just let it bake longer.
While the oven’s warming up, I get the burrito ready.
Step #3
Wrap it off. Foil, paper, whatever. If it has stuff like sour cream, guac, lettuce, or tomatoes inside, I usually scoop those out and set them aside. Then I rewrap the burrito as best I can.

Step #4
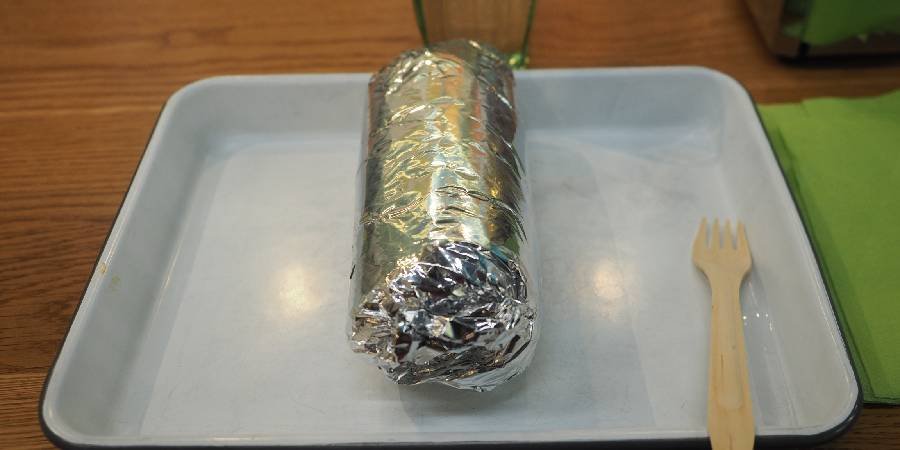
I use regular foil, nothing fancy. Wrap the whole burrito, particularly if someone took a bite out of it already. Gotta seal those open ends too. This step is key.
The foil traps the moisture so the tortilla doesn’t dry out and crack.
Step #5
Once it’s wrapped, I pop it on a baking tray. Sometimes I hear people say use a wire rack in the pan so the bottom gets crispier. I’ve tried that. Works fine. But honestly? A regular cookie sheet works just as well. I usually flip the burrito halfway through either way, so both sides get love.
Now the waiting
- If the burrito’s from the fridge and it’s average size, I give it about 15–20 minutes at 350°F. If I’m running the oven lower, like 250°F, it might take 30–45 minutes.
- If it’s frozen? Might be looking at 30–40 minutes at 350°F. Or, if I’m too hungry to wait and it’s still rock-solid, I’ve even gone 400°F for like 20–30 minutes. Just gotta watch it closely.
| Condition | Oven Temperature | Approximate Time |
| Refrigerated Burrito | 225°F – 350°F | 15-45 minutes |
| Frozen Burrito (Thawed) | 350°F | 30-40 minutes |
| Frozen Burrito | 375°F – 400°F | 20-45 minutes |
| Goal: Soft Tortilla | Lower temp + foil | Longer time |
| Goal: Crispy Tortilla | Any temp + remove foil | Last 5-10 minutes |
Once it’s finally heated through, I take it out (mitts on, of course: hot foil is no joke).
Bonus tip: if I’m craving that crispy outer layer, I unwrap it for the last 5–10 minutes. Gives the tortilla a nice little crunch without drying the whole thing out.
Method #2: Reheating in the Air Fryer
If you’re after that crunchy outside with a warm, soft inside? This one is good.
Step #1
It starts with warming up the air fryer. I usually go with 350°F. Some go lower, like 325°F. Others up to 375°F, especially for frozen ones. It also depends on how big the burrito is and how crispy you want it.
Either way , don’t skip preheating. That’s what gets the outside nice and crisp.
Step #2
Once it’s hot, I grab my leftover burrito. Not frozen, though – that’s a whole different approach. For this, it should be chilled, not rock solid.
Before tossing it in, I give it a little glow-up. A light spritz of olive oil or a quick brush with coconut oil works wonders. I’ve even used avocado spray. It makes the tortilla golden and crisp instead of dried out.
Step #3
Now, time to load it in.
I start with about 5 minutes. Then I flip it with tongs.
You want both sides golden, not just one. Depending on the size, I’ll add another 1–2 minutes. Sometimes even more- like 7 minutes total if it’s thick and I’m going for extra crunch.
I mostly go by eye. If it looks golden brown and smells amazing? It’s close.
Now, for frozen burritos-
If I’ve remembered to thaw it in the fridge the night before, great. It’ll heat more evenly. But honestly, I’ve also just gone for it straight from frozen.
In that case, I crank the air fryer to 400°F and give it about 15 minutes. Flip halfway through.
Step #4
Once it’s done? I let it sit for a minute. It keeps heating a bit inside, and it saves my tongue from burning off.
| Step | Detail | Temperature | Time |
| Preheat | Preheat your air fryer | 325°F – 350°F (can go higher for thicker/frozen) | A few minutes |
| Prepare Burrito | Spritz or brush with oil (optional) | N/A | N/A |
| Place in Air Fryer | Single layer in the basket, with space between | N/A | N/A |
| Air Fry (Side 1) | Cook | 325°F – 350°F | 5 minutes |
| Flip | Turn the burrito over | N/A | N/A |
| Air Fry (Side 2) | Continue cooking | 325°F – 350°F | 1-7 minutes |
| Frozen Burrito | Cook from frozen (optional, thawing is recommended) | 400°F (or lower initially) | 12-15 minutes |
Method #3: Reheating on the Stovetop
Step #1
First thing I grab is my go-to non-stick skillet. Nothing worse than a burrito sticking and falling apart.
I set the heat to medium. Not too high. Just enough to get things moving without burning the outside before the inside’s even warm.
Step #2
Then comes my little trick: just a tiny bit of oil. Like half a teaspoon. Sometimes I go for olive oil spray if I’m feeling lazy. The goal is to prevent sticking and help that tortilla crisp up evenly.
Step #3
While the skillet heats up, I do a quick check on the burrito. If it’s got stuff like sour cream, guac, lettuce, or tomatoes, I pull those out. They don’t reheat well, and trust me they’re way better cold and fresh at the end.
Step #4
Once the skillet’s hot, I place the burrito right in the center. Then I press it down lightly with a spatula for a few seconds. Just enough to get that bottom tortilla to the pan and brown up.
Now this next part- I put a lid over the skillet.
Yep. That’s the trick to heating it all the way through. The lid traps the heat and moisture, so the filling actually gets warm without drying out the tortilla.
I let it go for about 5 to 7 minutes on the first side. To make sure nothing’s sticking, I give the burrito a little wiggle mid-way through. Then, the flip! I carefully turn it over and let the other side cook for another 5 minutes or so. Lid stays on.
Step #5
Toward the end, though, I ditch the lid for a bit. Just for a minute or two. Helps the tortilla toast up even more. If I’m really looking for that perfect crunch, I’ll flip it again once or twice. It’s all about watching and adjusting.
And hey, if the tortilla got a little too crispy to roll? I don’t even stress. I just eat it like a tostada and call it a win. Haha.
Method #4: Reheating in the Microwave (When You’re Just Way Too Hungry)
Ah, the microwave. My go-to moves when I’m starving and the patient just isn’t in the mood to hang around. It’s quick. It’s easy.
But… yeah, I’ve had my share of microwave disasters.
It’s not fun. So, over time, I’ve picked up a few tricks that seriously leveled up my microwave game.
Here’s how I do it now:
Step #1
First of all, I never just toss it in and set it on high. That’s asking for trouble.
I always start by wrapping the burrito in a damp paper towel. Not soaked. Just damp enough to keep the tortilla from turning into a chewy mess. It helps trap steam and softens things up just right.
Remember: If the burrito still has foil on it? That’s gotta go. Like, always. Microwaving foil is basically how you set your kitchen on fire.
Step #2
Once it’s wrapped, I place it on a plate and go for short bursts.
- Usually, I start with 30 to 45 seconds on high.
- Then I flip it and do another 15 to 20 seconds.
- I keep going like that, flipping and zapping, until it feels hot throughout.
Skipping that flipping part? That’s how you end up with ice-cold centers and scorched ends. Learned that one the hard way.
Also – if your microwave has a turntable, make sure it’s actually spinning. That thing’s not just for show. It helps move the burrito around in the heat zone so you don’t end up with cold spots.
Step #3
Now, if I’m being extra careful (or heating a jumbo burrito), I’ll check the inside with a thermometer. Ideally, you want the center to hit 165°F.
Do I always pull out the thermometer? Nah. But when I do, it takes the guesswork out.
Step #4
Oh, and if my burrito has stuff like sour cream, lettuce, tomatoes, or guac, I always scoop that out beforehand. Heating those is like a total flavor killer. I just add them back in once everything else is warmed up.
And here’s a cool little bonus move: Sometimes I do a microwave first, skillet second combo. I heat the burrito through in the microwave, then toss it in a hot pan for like a minute or two. Yes, it tastes better.
Alternative Way To Reheat A Burrito
Let me tell you about some other interesting ways I’ve tried to reheat a burrito, besides the usual oven or microwave.
Method #1 Reheating with a Panini Press
This method’s a bit unconventional, but it totally delivers when you’re after something a little special.
Step #1
First things first: if my burrito is coming straight out of the fridge and feels like a cold, compact brick, I’ll usually give it a quick 30-second zap in the microwave. Just enough to take the chill off – not enough to cook it.
This step is optional, but it helps the heat penetrate more evenly once it hits the press.
Pro tip: skipping this can lead to a crispy outside and a still-cold middle.
Step #2
Now, let’s talk foil. Some people like to wrap their burrito in a loose layer of aluminum before it hits the grill. It kind of steams the burrito a bit while keeping the outside from crisping up too fast.
Me? Depends on my mood. If I want that extra-toasty finish, I skip the foil and just go in raw- maybe with a little spritz of olive oil or avocado spray on the grill plates to keep things from sticking.
Step #3
Once the panini press is preheated and ready, I place the burrito right in the center, carefully close the lid, and press it down gently.
Remember: gently.
I’m not trying to squish all the filling out, just get that good grill contact.
Step #4
I let it cook for around 4 to 5 minutes.
That’s usually enough time to heat it through while getting that tortilla beautifully crisped on both sides.
The nice thing about the panini press? It heats from the top and bottom at the same time, so you’re not left flipping or babysitting.
Step #5
Once it’s golden and smells amazing, I pull it off the press and let it sit for a minute. That quick rest helps the heat settle throughout and saves me from burning my tongue.
The result is a warm, gooey interior wrapped in a firm, slightly flattened, crispy shell with those iconic grill lines. It makes it feel like a fancy cafe lunch instead of leftovers.
Highly recommend it when you want something a little different but still totally satisfying.
Method #2 Deep Frying
Alright, let’s get real, sometimes you don’t just want to reheat your burrito. Sometimes, you want to level it up.
Here’s how I pull it off:
Step #1
First things first, I grab a heavy-bottomed saucepan or deep skillet and pour in about an inch of cooking oil (vegetable, canola, or peanut oil all work great).
Step #2
Then comes the critical part: getting the oil temperature just right. I use a thermometer and aim for about 365°F (185°C).
This step makes all the difference.
- Too cool, and the burrito soaks up oil like a sponge.
- Too hot, and the outside crisps up before the inside even knows what’s happening.
Step #3
While the oil is heating up, I prepare my burrito. I make sure it’s tightly rolled and sealed.
If it’s extra cold or particularly thick, I’ll sometimes give it a quick 30-second microwave warm-up to help the filling start heating from the inside out.
Step #4
Once the oil hits the sweet spot, carefully lower the burrito into the pan.
I let it fry for about 2 to 3 minutes per side, flipping it carefully once the first side turns that perfect golden brown.
It starts to smell amazing at this point- that rich, toasted tortilla scent is basically a siren call for your taste buds.
Step #5
After both sides are beautifully crisped, I lift it out with tongs and place it on a paper towel-lined plate to drain off the excess oil.
Step #6
Finally, I let it cool for a few minutes, because the inside is molten lava at this stage — seriously, be patient. Then I slice into it and eat: crispy outside, melty, savory inside. Total bliss.
This method might not be your everyday go-to, but when you’re feeling bold (or just want to treat yourself), deep-frying your burrito is a wildly satisfying move.
Tips, Tricks & Mistakes While Reheating A Burrito
General Reheating
- Try to Use a food thermometer when possible to ensure food safety.
- High heat can dry out the tortilla and make fillings rubbery. Use lower temperatures and patience for better results.
- Flip halfway through reheating (microwave, skillet, air fryer, oven) to avoid cold spots.
- Microwave in Short Bursts: Use 30-60 second intervals at 50% power to avoid rubbery textures and uneven heating.
Moisture Control
- Microwave: Use a Damp Paper Towel, wrap the burrito in a damp, not soaked, paper towel to prevent dryness.
- Oven: Use Foil Wrapping, wrap tightly in aluminum foil to trap moisture.
- Stovetop: Use a Lid to trap steam, gently warming the burrito without drying it out.
Handling Specific Ingredients
- Remove Cold Toppings First: Good practice is to take out sour cream, guacamole, lettuce, tomatoes before reheating, add them back fresh.
- With Eggs: For breakfast burritos, microwave at lower power to avoid rubbery eggs. A sprinkle of water or hot sauce inside can help.
Frozen Burrito
- Thaw in the Fridge First (Best Option): It helps in even heating and better texture.
- Use Microwave’s Defrost Setting (If in a Rush): Then heat at 50% power in intervals, flipping between rounds.
- Two-Step Reheat: Microwave first to warm the inside, then transfer to skillet, air fryer, or broiler to crisp up the outside.
- Wrap Frozen Burritos in Foil: Great for oven or skillet reheating because it helps heat to spread evenly and prevent burning.
Frequently Asked Questions
What’s the Best Way to Reheat a Burrito Without Drying It Out?
You can wrap it in foil (oven) or a damp paper towel (microwave) to retain moisture.
Can I Microwave a Burrito With Flour on It?
No, always remove foil before microwaving to avoid sparks or fire. It should be your go to practice.
How Do I Keep the Tortilla From Getting Soggy?
You can add moisture, flip during heating, and finish in a skillet or air fryer for crispiness.
Should I Remove Toppings Like Sour Cream Before Reheating?
Yes, you should re-add cold toppings like sour cream, guac, or lettuce after reheating.
What’s the Safe Internal Temp for a Reheated Burrito?
I follow at least 165°F (74°C) for food safety.
Conclusion
Successfully reheating a burrito is all about balance, getting that warm, evenly heated filling while preserving the tortilla’s integrity.
Microwave, Oven, Air Fryer and all other methods I have shown are good for you. However, You have already known which method works and might have already decided to test each of them. We have properly explained best way to reheat a burrito.
Let me know in the comment section how it tasted and which method you have tried.
To know about more recipes please visit: Serenity Cafe