Okay, so listen. I’ve been hooked on cherry popsicles lately.
But not just any popsicles.
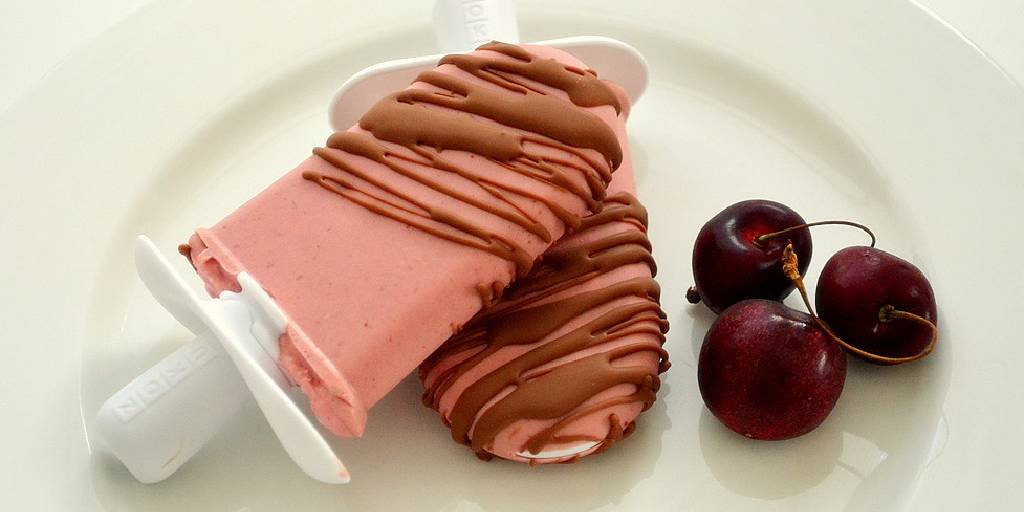
The kind with that crunchy, chocolate shell on the outside. Yeah, that homemade magic shell with cherry popsicles tastes good, particularly on summer days.
There’s just something about that crack when you bite into it. I love the cold, fruity cherry underneath. Smooth, snappy chocolate on top. Ugh. Too good.
Honestly, I can’t stop experimenting with different kinds of recipes. Been messing around with this one nonstop for the past couple of weeks.
And guess what? I finally nailed it. I found the easiest way and the most flavour variations.
So yeah, I’ve got stuff to share. All the little things I figured out on the way.
Here’s what I will share here-
- Why should you try cherry popsicles with homemade magic shell.
- Ingredients, equipment, step by step guide and flavour variations for making cherry popsicles.
- Ingredients, equipment, step by step guide, flavour variations, common troubleshooting and other aspects of making homemade magic shells.
- Lastly, tips, tricks, common mistakes, FAQ’s and Bottom Line.
So, let’s get right into it-
Why Cherry Popsicles with Homemade Magic Shell?
So, why cherry popsicles with magic shell, huh?
Honestly… it’s part nostalgia, part flavor, part texture. And yeah, a little bit of that “dang, I actually made this!” pride.
It all kinda started with some store bought popsicles.
They were fine, refreshing, sure. But something always felt like it was missing something. I kept craving real cherry flavor. Not that fake flavour.
That’s when I was like – “Wait, what if I made them myself?” No artificial anything, just fruit, and honey, maybe – all real ingredients.
And the color? That bright red from actual cherries? Way better than anything fake.
But here’s the thing. A cherry popsicle on its own? Tasty, sure. Still felt like it needed something more.
Here comes the magic shell.
Remember when you’d bite into a chocolate-covered ice cream bar and it’d crack? Yeah, that moment. That’s what I wanted.
Plus, the whole process is not that time consuming, it’s fast and easy. And let’s be real, it’s fun watching the chocolate harden in seconds.
It’s got that whoa, look at that! kinda feel.
So here’s why I’m obsessed:
- Natural flavor.
- Crunchy texture.
- Health(ish) Option.
- Totally Customizable.
- That Magic Shell.
Honestly, it’s really tasty and refreshing.
Let’s Make Cherry Popsicles First
A. Ingredients
For me, it always starts with picking good stuff. The better the ingredients, the better the pops. No surprise there.
| Ingredients | Purpose |
| 1. Cherries (fresh or frozen) | Main flavor + color + texture |
| 2. Honey/ Maple Syrup/ Sugar | Sweetness |
| 3. Yogurt/ Milk/ Coconut Cream | Creaminess, tang, texture |
| 4. Lime Juice | Balances the sweet with tart |
| 5. Water/ Apple Juice/ Coconut Water | Helps blending + optional extra flavor |
| 6. Strawberries/ Mangoes | Flavor variety |
Ingredient #1 Cherries
They’re the core ingredient here. I always choose dark sweet cherries.
It has a deep, rich flavor.
You will get fresh ones in season. But frozen pitted cherries? They are way easier to find at any season and usually cheaper. Plus, they’re ready to go.
If you’re using fresh, just remember – you gotta pit them.
Ingredient #2 Sweeteners
I usually go with honey. If I can grab some raw, local honey, they are even better.
Maple syrup also works great and adds a mellow, almost cozy taste.
No shame in white sugar either. It works. Just sweeten to your taste. Don’t forget how sweet your cherries are.
Ingredient #3 For Creaminess
- Greek yogurt is my usual pick. It gives that tang and a nice protein boost.
- Vanilla yogurt is also good if you want built-in flavor.
- Plain yogurt is better if you like to sweeten things your way.
- And if you need dairy-free, go with coconut cream or any non-dairy yogurt you like.
I’ve seen some people use milk too. Milk makes it very creamy.
Ingredient #4 Lime Juice
Lime juice, just a splash. It cuts the sweetness and brightens everything up. It’s optional though. But it really does something and I use this in my recipe.
Ingredient #5 Liquids
Sometimes I add a bit of water just to help things mix smoother. Apple juice or even coconut water can work too if you want a little extra flavor.
Ingredient #6 Optional Add-ins
You can also add strawberries, mangoes, or whatever fruit you’re into. You can totally experiment here. That’s the fun part I like.
B. Equipments
Okay, before jumping into cherry pops and that dreamy magic shell, I always make sure I’ve got the right tools out.
For the Popsicles
Equipment #1 First of all, popsicle molds: This one is totally non-negotiable.
I love using silicone ones ‘cause they make it way easier to pop the popsicles out once they’re frozen.
If the mold doesn’t come with sticks you need to have those too. Wooden ones work best.
Equipment #2 Blender is also 100% necessary: That’s gets your cherries smooth and mixable.
For the Magic Shell
You barely need anything special. You can usually go old-school.
C. Making Cherry Popsicles Step By Step
Let’s see how I make Cherry Popsicles-
Step #1
First of all, I had to get the cherries ready.
If I was using frozen ones, they needed to chill out a bit (not literally). I either poured hot water over them using a colander or just let them hang out at room temp for an hour.
If you have fresh cherries, you can go with that too.
Step #2
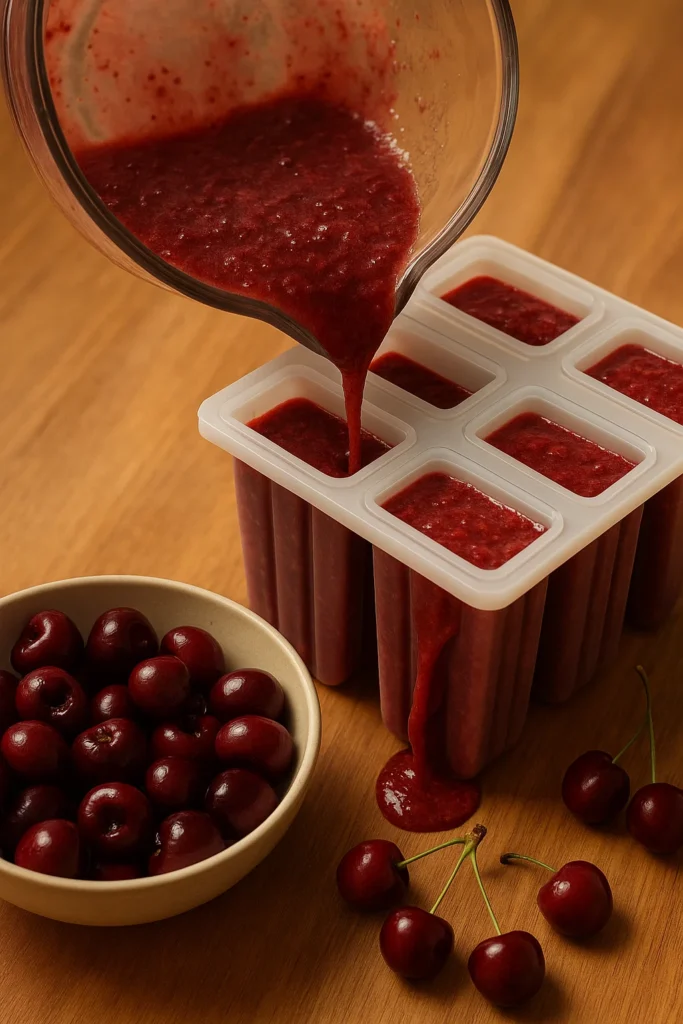
Next, I tossed all the softened and pitted cherries into the blender.
Also added some honey. Not a lot, just enough to make it sweet without overdoing it.
Blend the whole thing until it is smooth and looks like cherry juice.

Step #3
After blending, I carefully poured the mix into popsicle molds.
Then popped a stick into each one.
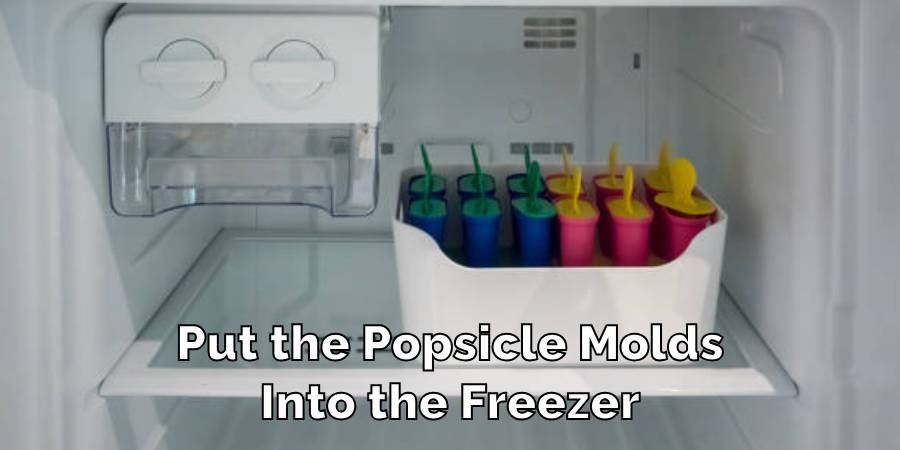
Step #4
This was the part that tested my patience.
I put the molds into the freezer. It took about 5–8 hours. Honestly, overnight worked best.
Step #5
Once they were frozen solid, I had the option to level them up.
I could dip them in yogurt. Yep, straight-up dipped them into a glass of yogurt, holding the glass at a little angle so it coated nicely.
If you don’t want a dairy, use coconut cream or dairy-free yogurt.
Step #6
After dipping, I placed each one on parchment paper (or a silicone mat if you’ve got that).
Threw them back in the freezer for like 10 minutes so the yogurt could firm up.
Step #7
Finally, the cherry popsicles are done and ready to be coated with a homemade magic shell.
Tip: You can eat those cherry popsicles at this stage. They taste good.
Cherry Popsicles In Different Flavours
I’ve been also brainstorming how to switch up my regular cherry popsicles. And I gotta say, there are a lot of ways to do that.
Here are a few ideas I find most delicious to try-
| Variation | Ingredients |
| Berry Cherry | Strawberries, Raspberries |
| Mint Cherry | Fresh mint leaves |
| Creamy Cherry | Maple syrup, Coconut cream |
| Chocolate Cherry | Cocoa powder, Magic shell |
Option #1
So, first off, I thought about pairing cherries with other berries. Strawberries and raspberries are obvious choices, but I also heard that cherry and mango go really well together.
Oh, and I also tried mixing blueberries too.
Option #2
Mintis also a good option. Taking a few fresh mint leaves and mixed in with the cherries sounds refreshing in the first place. You should definitely try this one.
Option #3
For a creamier texture, I tried switching up the yogurt. Instead of just plain vanilla, try plain yogurt with a little maple syrup.
Note: If I want to keep it dairy-free, coconut cream or dairy-free yogurt would work great as a vegan option.
Option #4
This one is a bit wild: chocolate cherry popsicles.
Blend in some cocoa powder for a chocolatey cherry flavour.
Option #5
This one’s a bit out there, but it sounds interesting: someone (I forgot her name actually) suggested adding salted nuts into the mix. Not exactly cherry-flavored, but the salty crunch could be a great idea.
Dairy-Free and Vegan Cherry Popsicle
I’ve been trying to come up with cherry popsicle ideas that everyone can enjoy, particularly, people who avoid dairy or are living the vegan life.
Follow this table-
| Dairy Containing | Dairy Free |
| Yogurt-Based | Dairy-free yogurt (almond, coconut, soy, oat) |
| Cream-Based | Coconut cream, Full-fat coconut milk |
| Milk Substitute | Almond milk, Soy milk, Oat milk, other plant milks |
How to Store Cherry Popsicles and Keep Them Fresh?
If I’m eating them soon…
If I’m planning to eat them soon, I can just leave them in the popsicle molds. It’s easy and helps protect them from the air.
For long-term storage
For popsicles I want to keep for a while, it’s better to remove them from the molds and then keep them in a separate box.
How long will they stay good?
For the best taste and texture, I suggest eating cherry popsicles within 6 months if they’re stored properly. After that, they might start getting icy or lose some of their fresh flavor.
Now Let’s Make The Homemade Magic Shell
From what I can gather, a magic shell is basically this chocolate topping for cold desserts, like ice cream or popsicles. The coolest thing about it is that when you pour it on, it’s all liquid.
But here’s the magic: as soon as it hits something cold, like my popsicle, it hardens almost instantly into a crispy shell.
And that’s why it’s called a magic shell.
A.Ingredients for Homemade Magic Shell
It turns out there are two main ingredients: chocolate and an oil that hardens when it hits something cold.
Here’s A quick summary For the ingredients if you are lazy like me-
| Category | Ingredient |
| Main | Chocolate |
| Oil (that hardens) | |
| Optional | Vanilla extract |
| Peanut butter | |
| Salt | |
| Flavor extracts | |
| Liquid stevia | |
| Dairy-free/vegan chocolate |
Ingredient #1 Chocolate
When it comes to chocolate, there are a lot of options-
Most recipes call for chocolate chips, and you can pick from semisweet, dark, or even milk chocolate based on what you like.
Ingredient #2 Oil
Now, for the oil that makes the chocolate harden, coconut oil is the go-to choice.
I’ve learned that: “The key of using an oil is that it gets solid at room temperature, so it can quickly solidify on cold popsicles.”
Some recipes suggest using refined coconut oil if you want a more neutral flavor, so the coconut taste doesn’t overpower the chocolate.
Optional Ingredients:
Pretty much any oil works, and some people even recommend using butter as an alternative, although it might not give that nice thin shell like coconut oil.
For extra flavor, some recipes add a little vanilla extract. If you’re going dairy-free or vegan, you’ll need to pick dairy-free/ vegan chocolate.
I also thought it’d be fun to make flavored shells, like peanut butter magic shell. For that, I mix peanut butter into the melted chocolate and oil.
B. Making Homemade Magic Shell [Step By Step]
Alright, so I’m finally ready to try making my own magic shell for these cherry popsicles.
Here’s how it seems to go based on what I’ve learned:
Method 1: Using Microwave
First thing’s first, I need to grab my ingredients. The basic recipe is pretty simple:
About 1 cup of chocolate chips and around 2-3 tablespoons of coconut oil for every cup of chocolate chips.
Oh, and my bowl needs to be completely dry before I start.
- I’ll toss the chocolate chips and coconut oil into a microwave-safe bowl.
- At this point I melt them carefully. I’ll microwave it on 50% power, but in short bursts of 15-30 seconds. After each burst, I’ll stir it well so the chocolate doesn’t burn.
- I’ll keep repeating this process until it’s all smooth and there are no lumps.
- Once it’s melted, I’ll let it cool slightly for about 20 minutes. This step helps prevent it from melting my popsicles too quickly when I pour it on.
Method 2: Using the Stovetop (Double Boiler)
I can also make the magic shell on the stovetop, and here’s how that would go:
- First, I’ll gather about 4-5 ounces of chocolate (chips or chopped up chocolate bar) and 1 tablespoon of coconut oil per 4 ounces of chocolate. [You can change quantity based on the amount of popsicles]
- To set up the double boiler, I’ll place a heatproof bowl over a saucepan with barely simmering water in a way that the bowl doesn’t touch the water.
- Next, I’ll put the chocolate and coconut oil into the bowl.
- I’ll stir gently and consistently until everything’s smooth and melted. The key here is not to overheat it, so I’ll keep an eye on it.
- After it’s all melted, I’ll let it cool a bit before pouring it over the popsicles.
C. Important Notes
- I learned that pretty much any oil can work, so if you are not into coconut oil, you can use vegetable oil, shortening, or even butter. But coconut oil is definitely the most popular for getting that quick hardening effect.
- For a thinner shell, using a chocolate bar (chopped) gave me a better texture than chips.
- You can mix in some extra flavors like vanilla extract for a little twist, or even a pinch of sea salt to balance out the sweetness.
D. Troubleshooting Common Magic Shell Issues:
I’ve come across a few magic shell hiccups or issues while making my cherry popsicles.
But don’t worry, here are some helpful tips to fix them when things don’t go as planned:
Issue 1: Magic Shell Hardens Too Fast
Possible Cause: The shell wasn’t cooled enough after melting.
Solution: If the magic shell is hardening too fast before I can drizzle it on my popsicles, I can just let it cool a little before using it. If it’s already hard, I can reheat it gently in the microwave (in short bursts) or use a double boiler to get it back to the right consistency.
Issue 2: Magic Shell Doesn’t Harden
Possible Cause: The shell is too warm, the popsicles aren’t cold enough, or not enough coconut oil was used.
Solution: To fix this, I need to cool the shell a bit more before applying it. Also, I should make sure my popsicles are frozen before dipping. Also, checking if the right amount of coconut oil is used for hardening.
Issue 3: Magic Shell Turns Gritty or Seizes
Possible Cause: Moisture got into the chocolate while melting.
Solution: To prevent this, I make sure my bowl and utensils are completely dry when melting the chocolate and oil. If my shell does seize, I can also fix it by setting the bowl over a pot of boiling water and stirring until it becomes smooth again.
Issue 4: Magic Shell Solidified During Storage
Possible Cause: Storing at room temperature.
Solution: If my magic shell solidifies in the jar or squeeze bottle, I can just gently reheat it in the microwave or place the jar in hot water to return it to its liquid form.
Add the Magic Shell To Cherry Popsicles & Serve
The best time to add magic shell is when cherry popsicles are completely frozen.
This helps the shell harden properly.
I’ve seen you can be creative with how you put it on;
- You can drizzle it over the pops with a spoon for a pretty effect, or for a more complete coating,
- You can dip the entire popsicle into the melted chocolate mixture.
- You can also add sprinkles or crushed nuts right after applying the shell, before it sets.
For serving, these cherry popsicles with magic shells are perfect on their own as a refreshing treat. You could also get creative and serve them with other toppings if you want.
FAQs
How to Make Popsicles Less Icy?
Use fat-rich ingredients like Greek yogurt or coconut milk. Also, you can add a little cornstarch.
What’s Needed for Homemade Magic Shell?
Typically, you need just chocolate chips and coconut oil.
How to Store Leftover Magic Shell?
You can store leftover magic shell at room temperature in an airtight container. Try to avoid refrigerating it.
How Long Do Homemade Popsicles Take to Freeze?
Generally, it takes at least 4-6 hours in my case. Sometimes it takes overnight if the size of the popsicles are bigger.
Bottom Line
So, looking back on my research in making cherry popsicles with homemade magic shell, I’ve learned a few important things-
For the pops themselves, using frozen cherries ia a bit more convenient. I found simple recipes using just cherries, water, and a touch of sweetener or adding yogurt for creaminess. And for that amazing magic shell, coconut oil is definitely my go-to for that quick hardening.
All in all, it’s been a fun and delicious process, and I suggest to keep experimenting with different flavors and enjoying this perfect summer treat.
You may read also – Best Way To Reheat A Burrito