Just saying the name Panna Cotta makes it sound mouthwatering, right? It’s originally an Italian dessert.
The name “Panna Cotta” itself has a meaning. It means “cooked cream.” It’s basically a creamy custard that is made with heavy cream, sugar, and gelatin.
And when it comes to all the variations out there, my top choice has to be White Chocolate and Hazelnut Panna Cotta.
Let’s see step by step guide on how to prepare white chocolate and hazelnut panna cotta very easily through my experience-
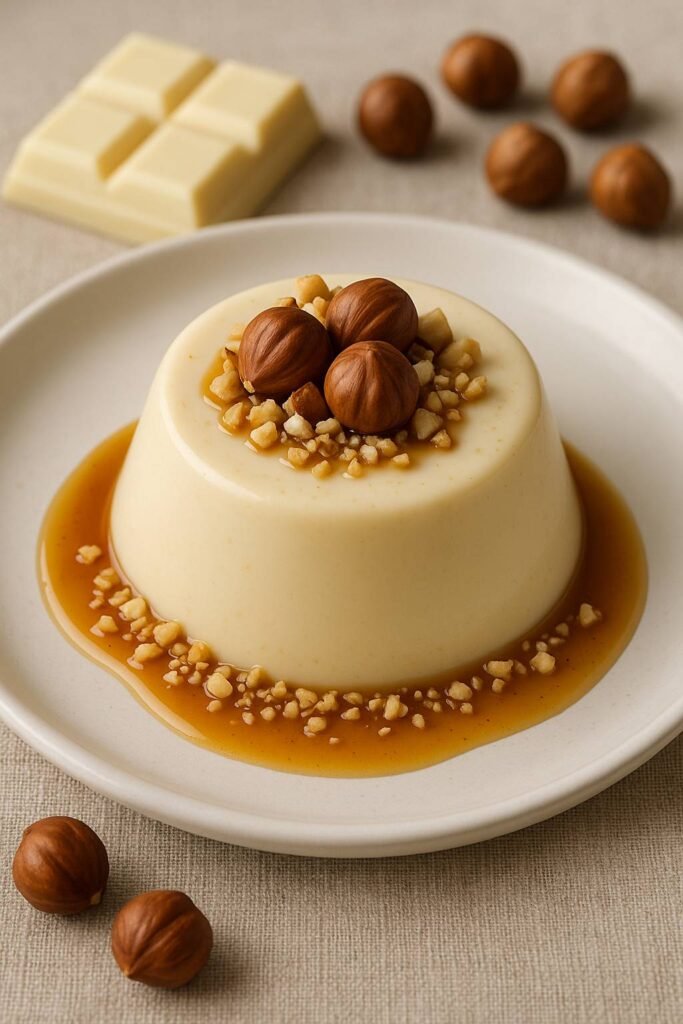
White Chocolate And Hazelnut Panna Cotta Recipe Guide
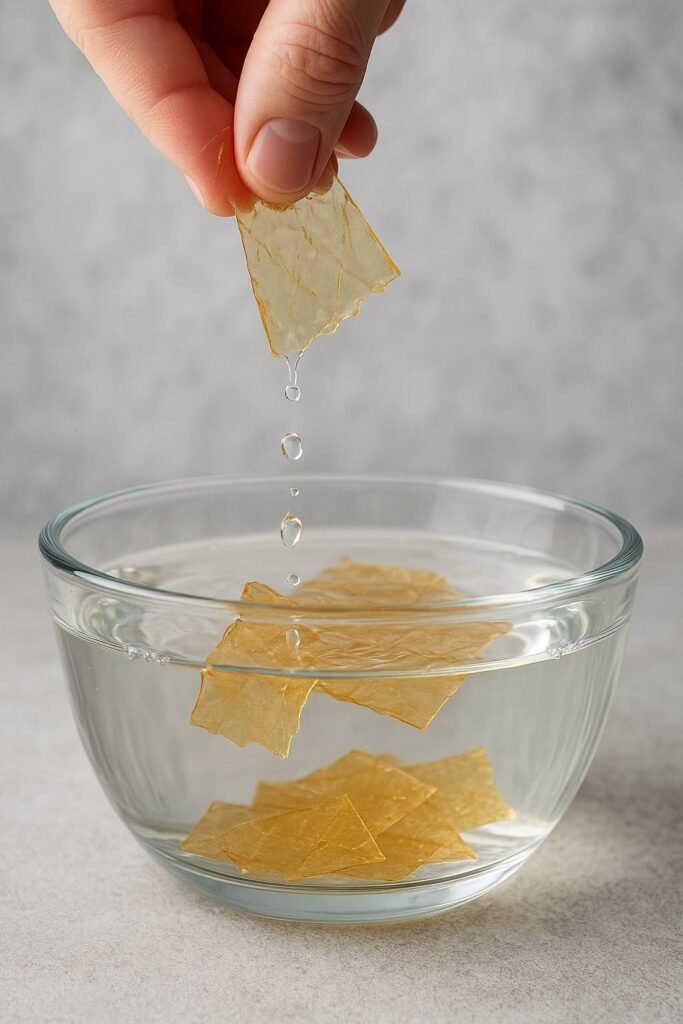
Step #1 Soak the Gelatin
First of all, I get the gelatin ready.
If I’ve got the sheet kind,
- I drop them into a bowl of cold water one by one. Got to make sure they’re totally under the water.
- Then I just leave them there to soak. About 5 minutes does the trick.
- They’ll get all soft and squishy.
On the contrary,
If I’m using a powdered version, it’s a little different.
- I take a small bowl and mix in a couple spoons of cold milk or water.
- Then I sprinkle the powder over the top.
- No need to stir , just let it sit.
- It’ll soak up the liquid and bloom in about 5 to 10 minutes.
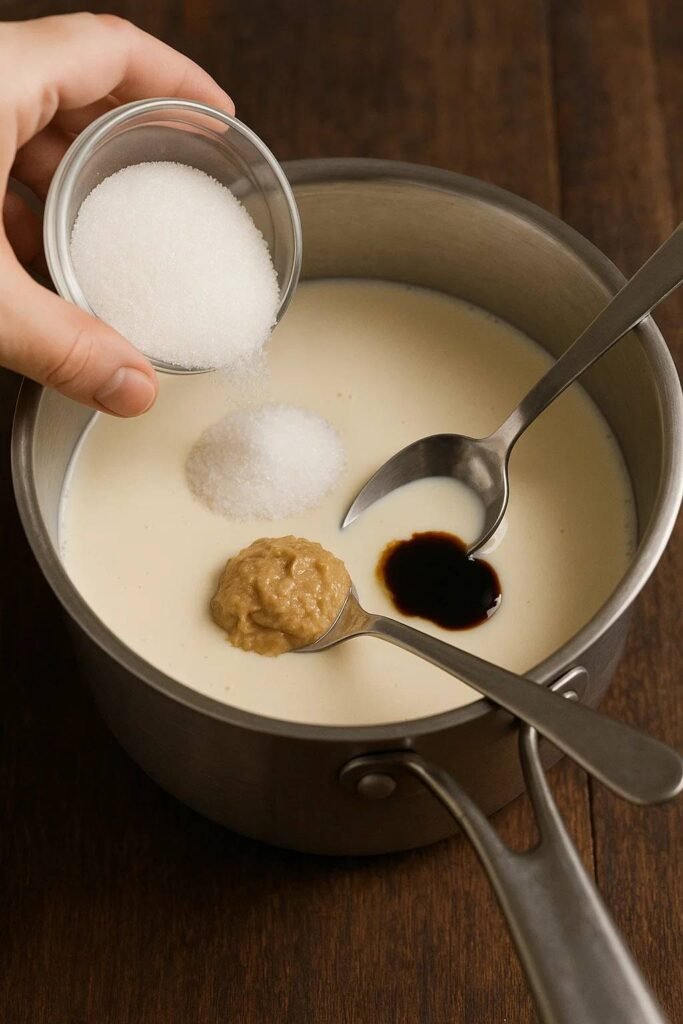
Step #2 Heating the Creamy Base
While the gelatin is off soaking, I move on to the creamy part-
- I take a saucepan.
- Then I pour in some heavy cream and whole milk.
- Next up, I mix in some caster sugar, a spoon of hazelnut paste, and a spoonful of vanilla either extract or paste, whatever I’ve got.
- I set the pan on low heat.
- I warm it up nice and slow.
- Every now and then, I give it a stir.
Important: don’t let it boil. That’ll mess with the gelatin later.
I keep it on the heat until it’s just steaming. No bubbles, just a gentle warmth. By then, the sugar should be all melted in.
Tips: To double check, I sometimes rub a tiny bit of it between my fingers.
If it feels smooth, then I’m good.
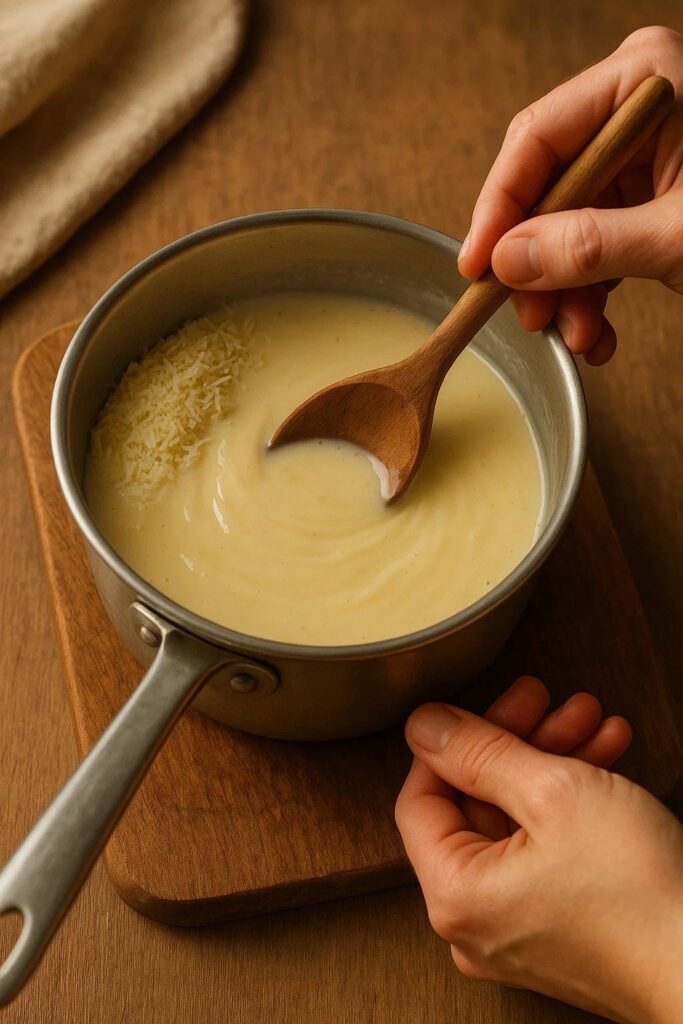
Step #3 Melting in the White Chocolate
Now that the cream’s warm and the sugar’s all melted in, I take it off the heat.
Now time for the best part: white chocolate.
I take some finely chopped white chocolate or just use shavings if I have those. Then I mix it straight into the warm cream.
- I give it a slow stir.
- No need to rush.
- It melts pretty fast and turns the whole thing into this silky-smooth mix.
Quick tip: Use the good kind. It should have cocoa butter in it. That’s what makes the texture and taste hit just right.
Step #4 Add the Gelatin
Next up, I take the gelatin.
If it’s the sheet kind, I give it a light squeeze to get rid of the extra water. Not too hard, just enough to get it damp, not dripping.
If I used the powdered one, it would be all bloomed and wobbly by now. It looks kind of weird, but that’s how it should be.
- I add the softened gelatin into the warm white chocolate and cream mix.
- Then I stir or whisk it in until it melts down completely.
Note: If I want a silky finish, I’ll pour the whole thing through a fine mesh sieve into a clean bowl.
Step #5 Cooling and Setting
Now, if I’m using vanilla paste, I don’t want those tiny vanilla seeds sinking to the bottom.
To stop that and to help everything set just right I let the mixture cool down a little first. [Not cold, just less hot.]
You can skip it, but sometimes I take a bowl, fill it with ice and water, and stick my panna cotta bowl inside it. Then I stir it now and then until it starts to thicken just a bit. It’s just a quick cool down trick I use.
Once it’s not hot anymore, I pour the mixture into my serving cups or in small bowls.
If I’m feelin’ extra, I’ll add a chocolate hazelnut layer at the bottom. All I do is mix a spoon of spread with some chopped roasted hazelnuts and drop that in first. Then the white chocolate mix goes right on top.
After that, I cover them with plastic wrap and pop ’em in the fridge. They’ll need at least 4 hours to firm up.
For me? I just leave them overnight. Waking up to a set panna cotta is a good morning.
Step #6 Passion Fruit Coulis (Optional)
While the panna cotta chilling in the fridge, I can get the passion fruit topping ready.
Totally optional, but it adds a nice zing.
- I take a few passion fruits and scoop the pulp into a small saucepan.
- Seeds and all.
- Then I mix in some caster sugar.
- I put it over medium heat and stir it around until the sugar melts and it starts to thicken a bit.
- It doesn’t need to be syrupy, just a little richer than juice.
- Once it’s there, I take it off the heat and let it cool down all the way.
- Then it goes in the fridge till I’m ready to use it.
Step #7 Serving and Enjoying
Now, it’s time to serve. Once the panna cotta’s all set, it’s good to go.
If I used ramekins, so I need to pop them out with a little trick:
- I run a thin knife around the edges first. Just to loosen it up. Then I put the bottom of the ramekin in hot water for 5-10 seconds. That helps it slide out easier.
- Next, I flip it. Plate goes on top, then I turn the whole thing over. And boom usually slips out smooth and perfect.
Now for the toppings-
- I pour some chilled passion fruit coulis on top or around the edges that I made earlier.
- If I’m feelin’ fancy, I add on a few fresh berries.
- Maybe some toasted hazelnuts.
- Or a dusting of shaved white chocolate.
Quick Tips for White Chocolate & Hazelnut Panna Cotta
- Go for the real white chocolate. The kind with cocoa butter, not that with vegetable fat. It melts better, tastes better.
- Add hazelnut in the way you like. Hazelnut paste is perfect. However, a spoon of chocolate hazelnut spread also works.
- Don’t boil the mix: When the cream, milk, and sugar are in the pan, just warm it gently. Boiling messes with how the gelatin sets.
- Give it time to cold down: Four hours is the bare minimum. Overnight is even better.
- Balance the sweetness: That creamy mix can be a lot, so add something tart on top. I add Passion fruit coulis for that.
Variations White Chocolate And Hazelnut Panna Cotta
Variation #1 Vegan Options
You can easily make panna cotta vegan by swapping out regular milk and cream for plant-based options like-
- oat milk,
- cashew milk,
- almond milk,
- soy milk.
If you want a richer texture I would suggest using full fat coconut milk or coconut cream.
Instead of gelatin, you should go for agar agar powder or other plant based thickeners like-
- cornstarch
- arrowroot starch
..to get the panna cotta to set.
Tip: If you use agar agar, make sure to boil it first to activate its gelling factor.
Variations #2 Nut Substitutions
If you are out of hazelnuts or simply don’t like it, you can switch them out for other nuts like almonds. You can also try making a Mixed Nut Milk variation.
Variation #3 Layered Panna Cotta
It’s just a fun idea to make a layered panna cotta with different flavors.
For example, I made a mini batch of hazelnut panna cotta with chocolate to try out a layered look. Layering chocolate and vanilla panna cotta is another good idea for dessert.
You can also mix it up by layering a nut based panna cotta with a classic dairy one. Or, try something more creative and add a layer of fruit puree (like raspberry, blueberry, or mango) between a chocolate spread base and a white chocolate panna cotta.
Other Flavor Ideas
You can try all kinds of flavors for panna cotta beyond just nuts.
For example,
- Vanilla Bean Panna Cotta.
- Chocolate Panna Cotta
- Coffee flavored panna cotta
- Coffee Caramel Panna Cotta
Bottom Line
And that’s it. White Chocolate and Hazelnut Panna Cotta is done my way.
Remember to ensure you adjust the sweetness depending on any extra sweet additions, like chocolate or flavored spreads.
And when you’re swapping ingredients, particularly for vegan panna cotta, you’ll probably need to figure out how much liquid to use with your thickening agents to get that smooth and creamy texture you want.
I hope you find this recipe effective. Let me know how your white chocolate and hazelnut panna cotta tasted like.
You may read also – Pillsbury Biscuit Donuts Recipe